

- Containers - ECS clusters, services and tasks, on both the EC2 and Fargate launch types
- Compute - EC2 instances, Auto Scaling groups, and Lambda functions
- Databases - RDS instances (MySQL, PostgreSQL, MariaDB, Oracle, SQL Server), Aurora clusters including members and read replicas, and ElastiCache (Redis and Memcached)
- Storage and messaging - S3 buckets, EBS volumes, and SQS queues
- Networking - VPCs, subnets, security groups, load balancers, target groups, internet gateways, and NAT gateways
- Multi-Region Support - Discover resources across all your specified AWS regions
ECS discovery reads
ecs:ListClusters, ecs:ListServices, ecs:ListTasks and the matching ecs:Describe* actions, all of which are covered by the ReadOnlyAccess managed policy attached in Step 1. If you replace that policy with a narrower one that omits them, ECS is skipped and the rest of the discovery still completes.Step 1: Create IAM Role
Access the AWS Management Console using an account that has the necessary permissions to create IAM roles. Then, proceed with the steps outlined below:
- Access IAM: Navigate to the IAM service in the AWS console.
-
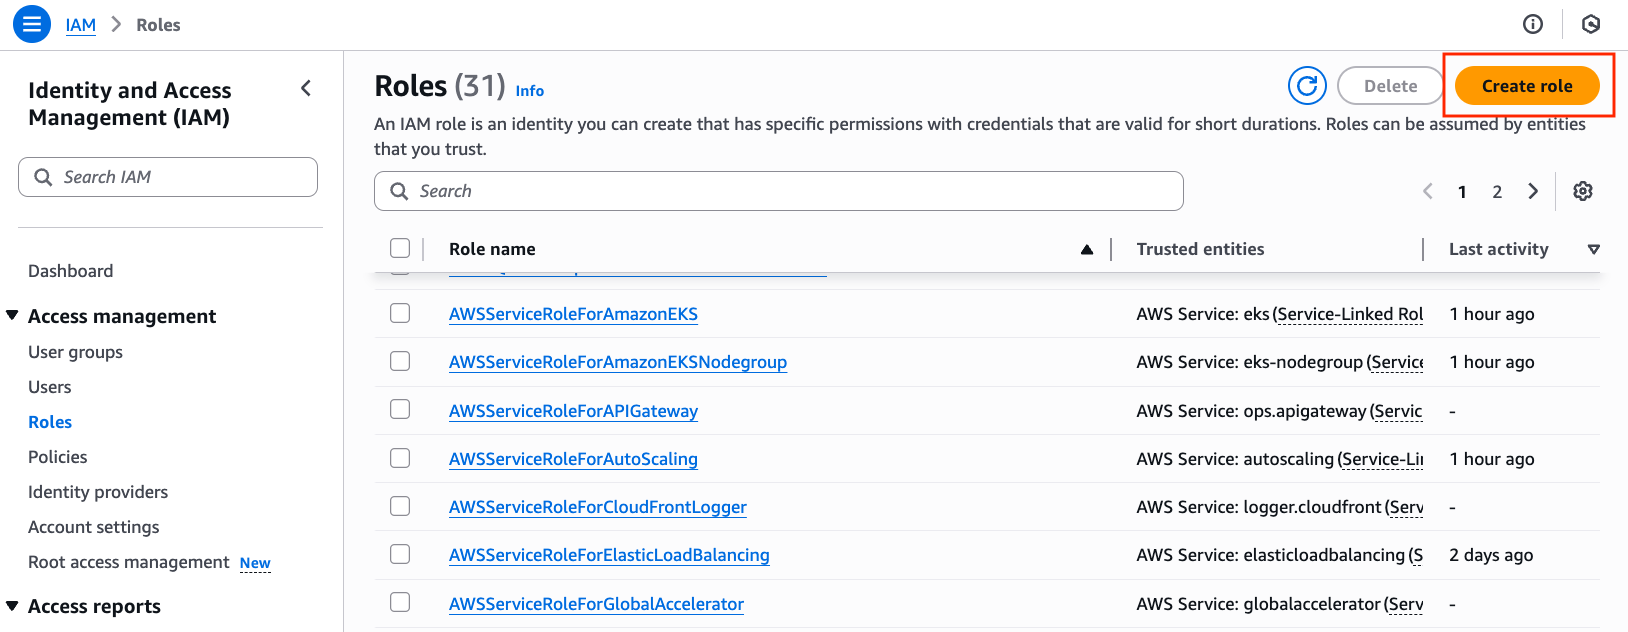
Create a new role: In the navigation pane on the left, choose Roles > Create role.
-
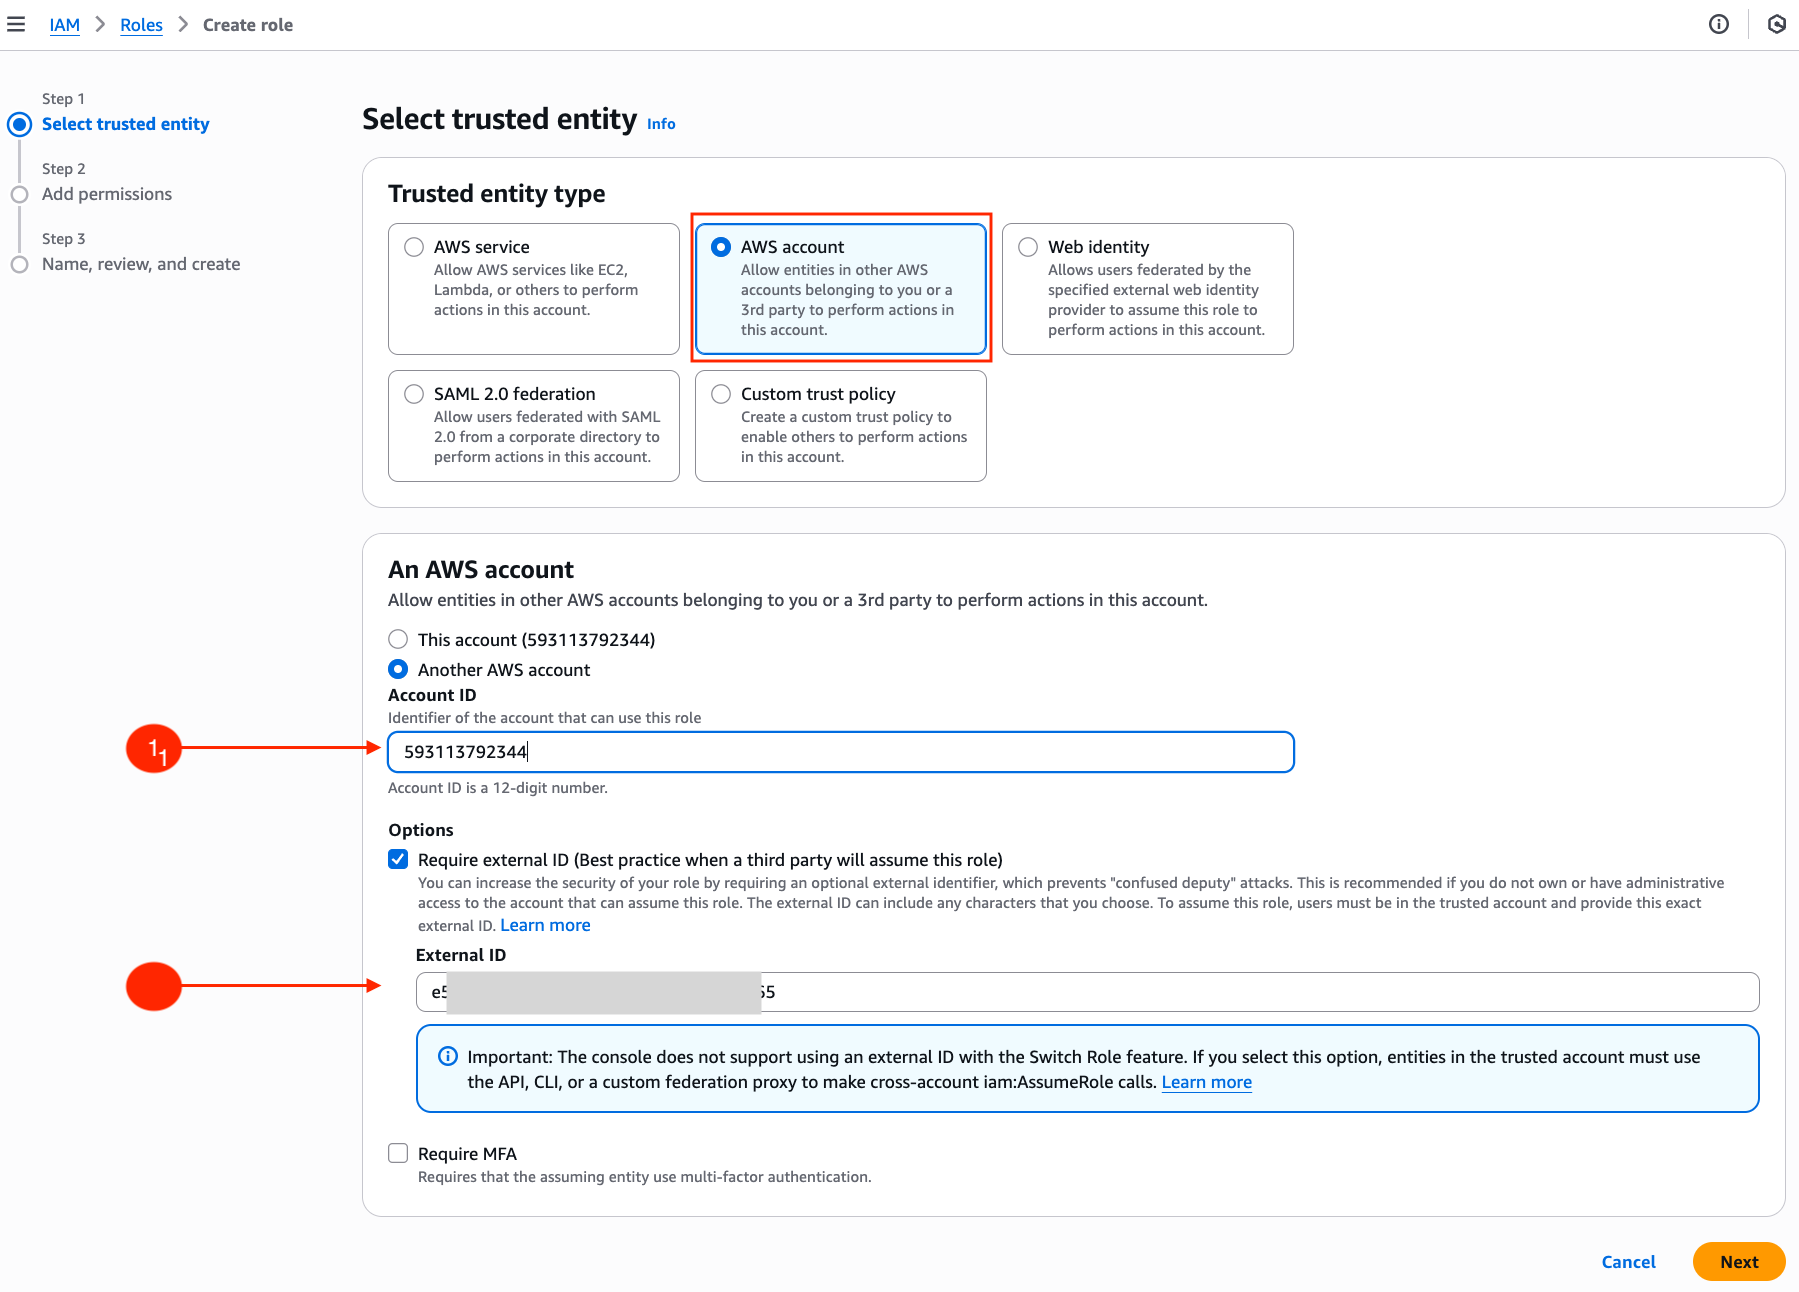
Enter credentials:
- Add NOFire AI’s Account ID: In the Account ID input box, paste the NOFire AI AWS Account ID: 593113792344. This will give us access to the IAM role.
- Add an External ID: Under Options, enter a unique external ID (you’ll need this later). You can generate one or use the one provided in the NOFire AI dashboard.
-
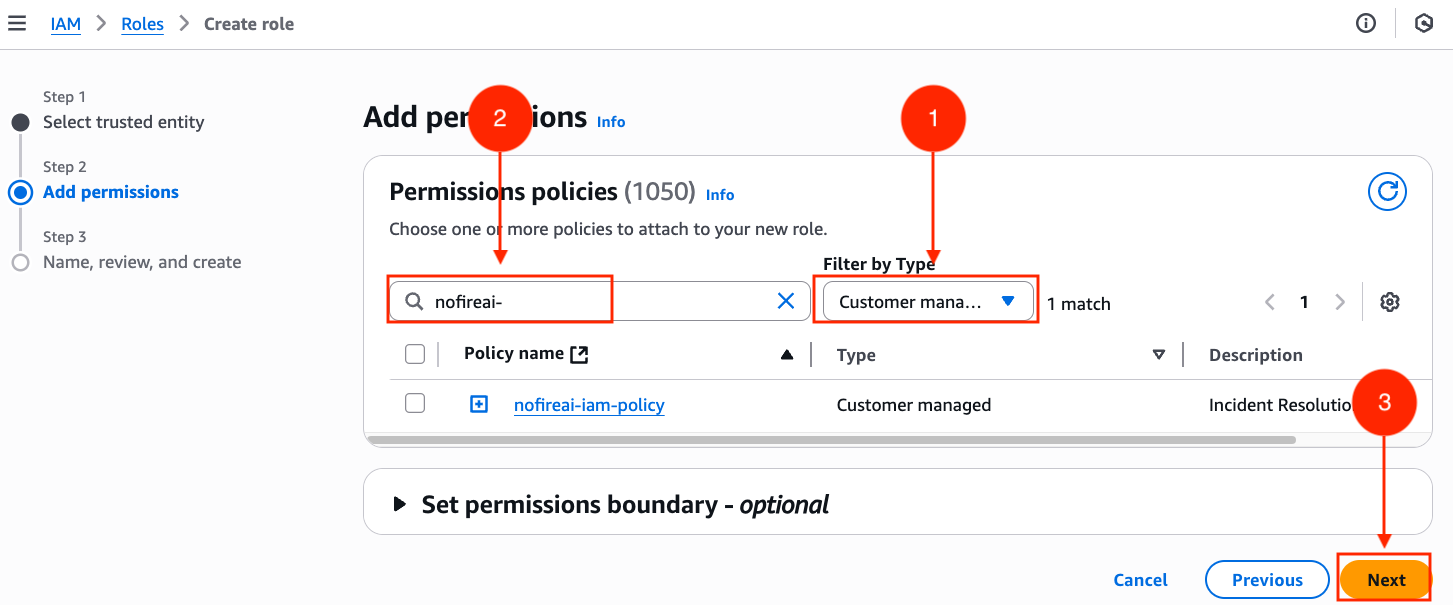
Assign permissions: On the permissions console, search for and attach these AWS managed policies:
- ReadOnlyAccess - Provides comprehensive readonly access across all AWS services
- CloudWatchLogsReadOnlyAccess - Enables log querying and analysis
- AmazonRDSPerformanceInsightsReadOnly - Provides deep RDS database performance insights
-
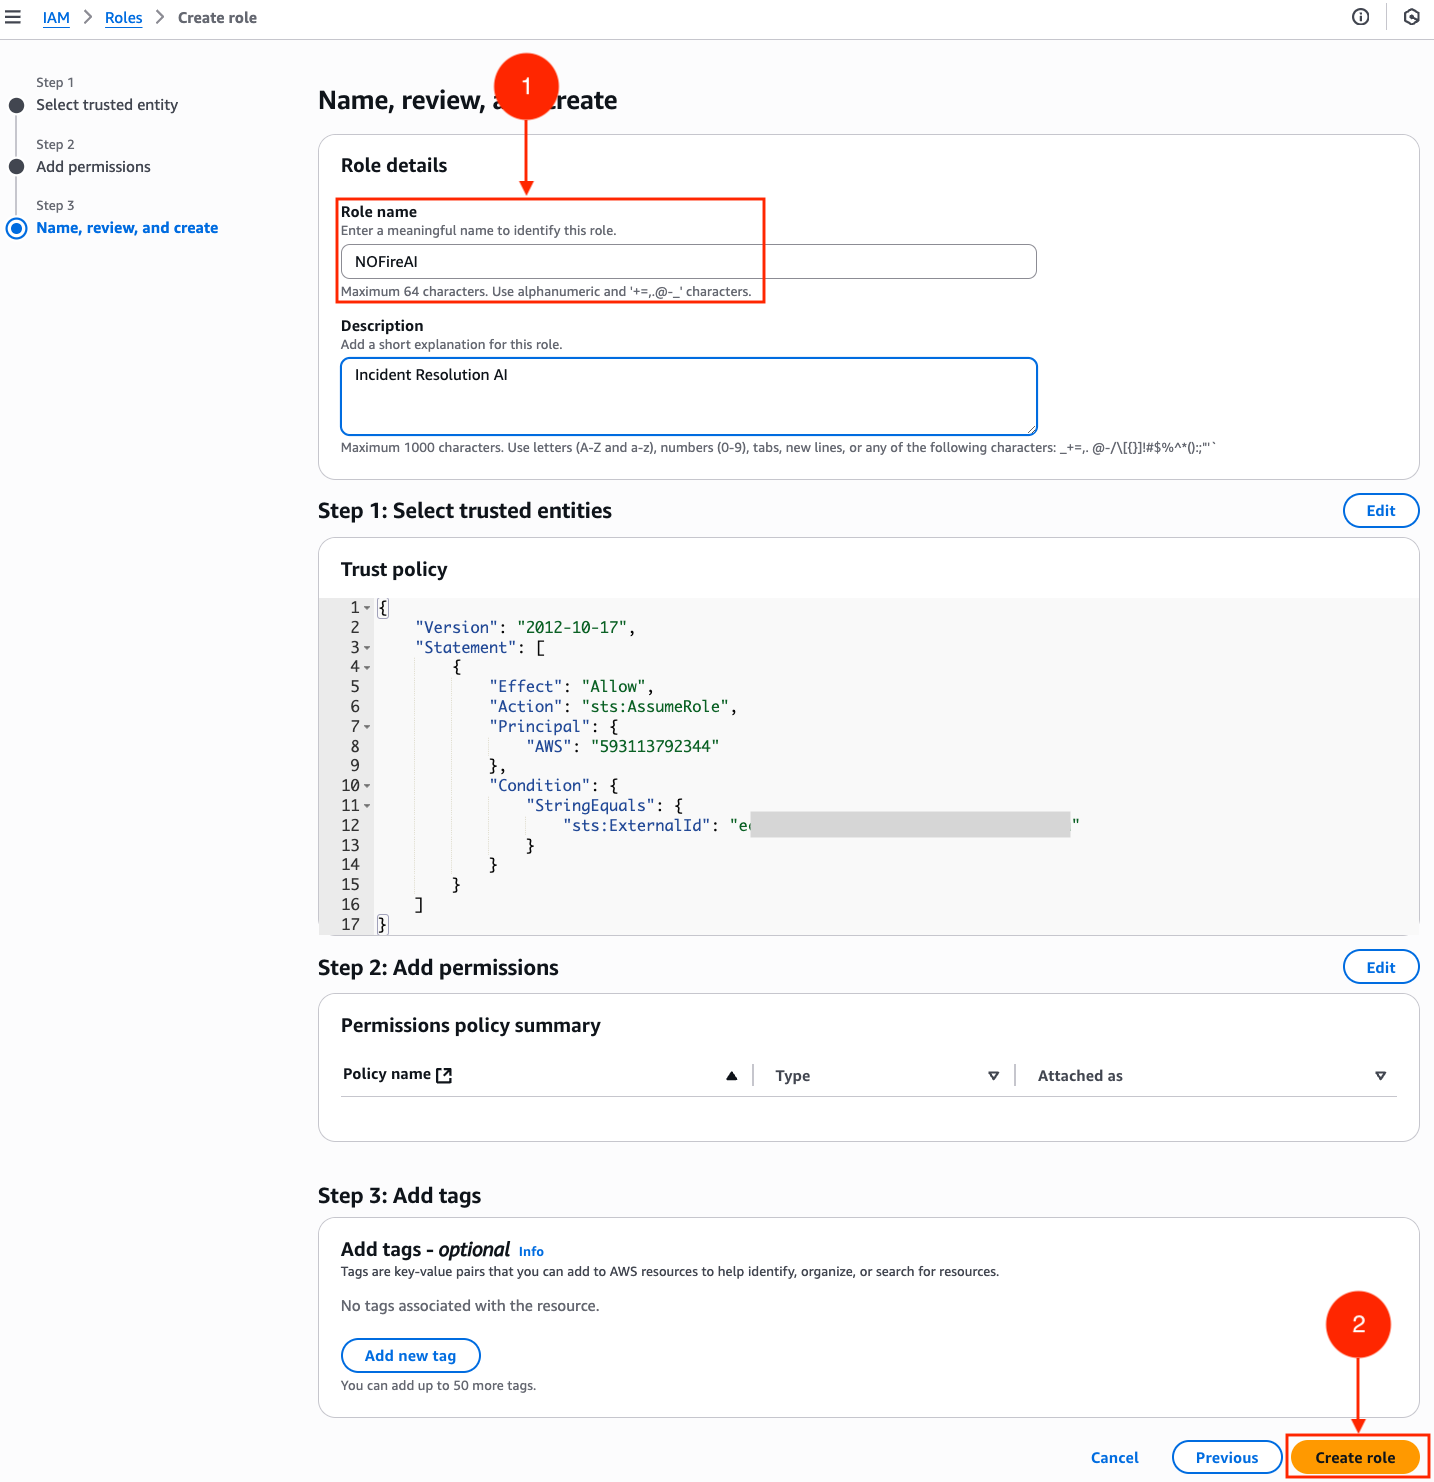
Finalize and review:
- Role name: Enter a descriptive name (e.g.,
nofireai-readonly-role) - Description: Add an optional description (e.g., “NOFire AI readonly access for infrastructure discovery”)
- Review the three attached policies and trust relationship
- Role name: Enter a descriptive name (e.g.,
- If everything looks correct, click the Create role button at the bottom right corner.
-
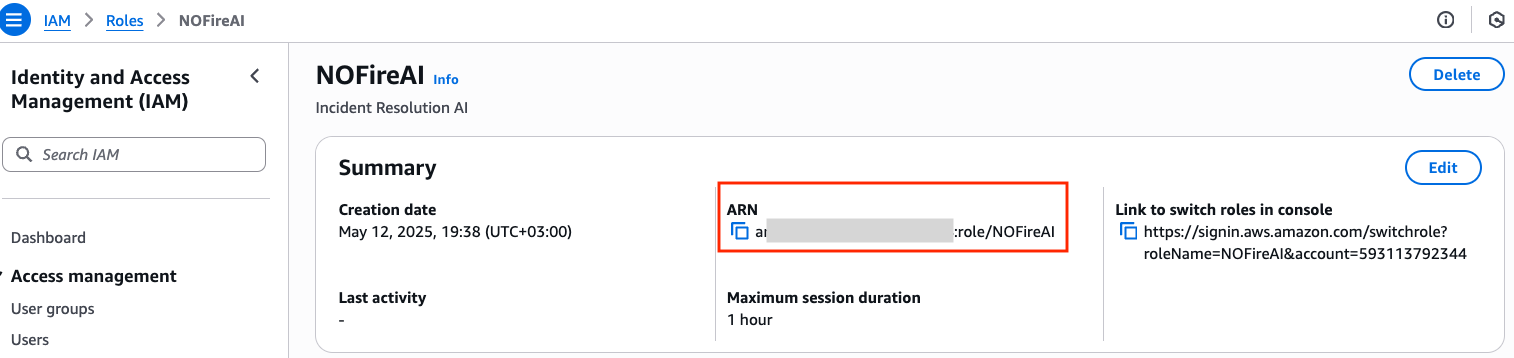
Copy the Role ARN: Once the role is created, navigate to it and copy the role ARN. You’ll need this to complete the connection setup on the NOFire AI dashboard.
Alternative: Create role using AWS CLI
Alternative: Create role using AWS CLI
For automation or scripting, you can create the IAM role using the AWS CLI:
Alternative: Create role using Terraform
Alternative: Create role using Terraform
If you manage infrastructure with Terraform, copy the module below into your configuration. Set Apply the configuration and copy the role ARN from the
external_id to the value shown in the NOFire AI dashboard — keep it secret and never commit it to version control.nofireai_role_arn output:Step 2: Add AWS Connection to NOFire AI
-
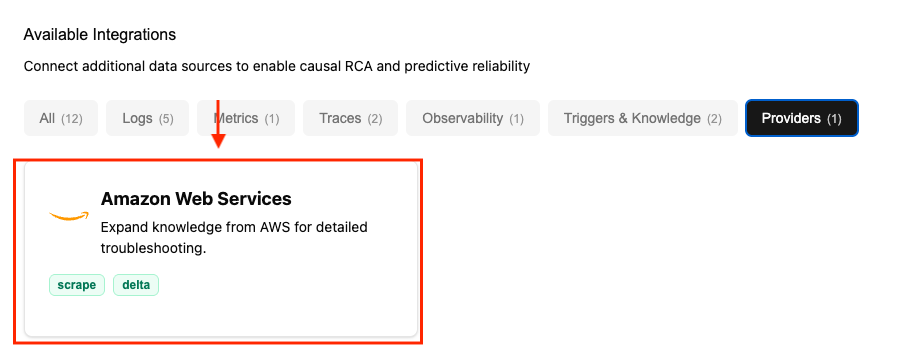
Select AWS: From the list of available connections, select AWS.
Click Next at the top right corner.
-
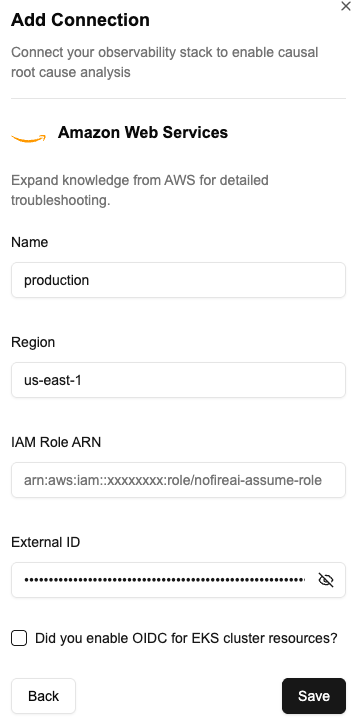
Enter connection details:
- Connection name - A descriptive name for this connection (e.g., “Production AWS”, “Staging Environment”)
-
Role ARN - The IAM role ARN you copied from AWS (e.g.,
arn:aws:iam::123456789012:role/nofireai-readonly-role) - External ID - The unique external ID you used when creating the role
-
Regions - Select one or more AWS regions to discover (e.g., us-east-1, us-west-2, eu-west-1)
-
Connection initialization: Once the connection is established, NOFire AI automatically:
- Validates the IAM role and permissions
- Discovers your container, compute, database, storage and networking resources across the specified regions
- Builds the infrastructure graph and tracks relationships
- Updates the connection status to READY when complete