NOFire AI supports both Elastic Cloud and self-hosted Elasticsearch instances. For self-hosted instances, NOFire AI can connect securely using an AWS VPC PrivateLink to ensure all traffic remains within your network boundary.
Prerequisites
Before connecting Elasticsearch to NOFire AI, ensure you have:- An Elasticsearch cluster (Elastic Cloud or self-hosted)
- Network access to your Elasticsearch endpoint from NOFire AI
- Admin access to create users and API keys
Step 1: Configure Elasticsearch Authentication
Elastic Cloud
Create API Key in Elastic Cloud
Create API Key in Elastic Cloud
- Sign in to Elastic Cloud
-
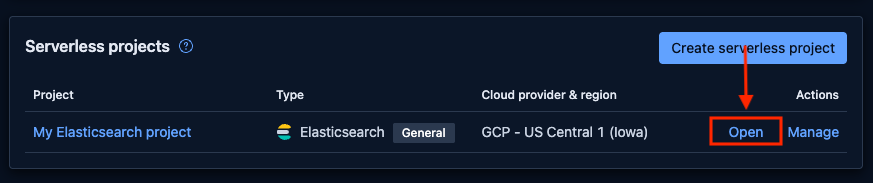
Open your deployment: Click on the deployment you want to open
-
Copy the Elasticsearch Endpoint: On the deployment page, copy the Elasticsearch endpoint URL. You’ll need this later.

-
Create API Key:
- Go to Security > API keys
- Click Create API key

-
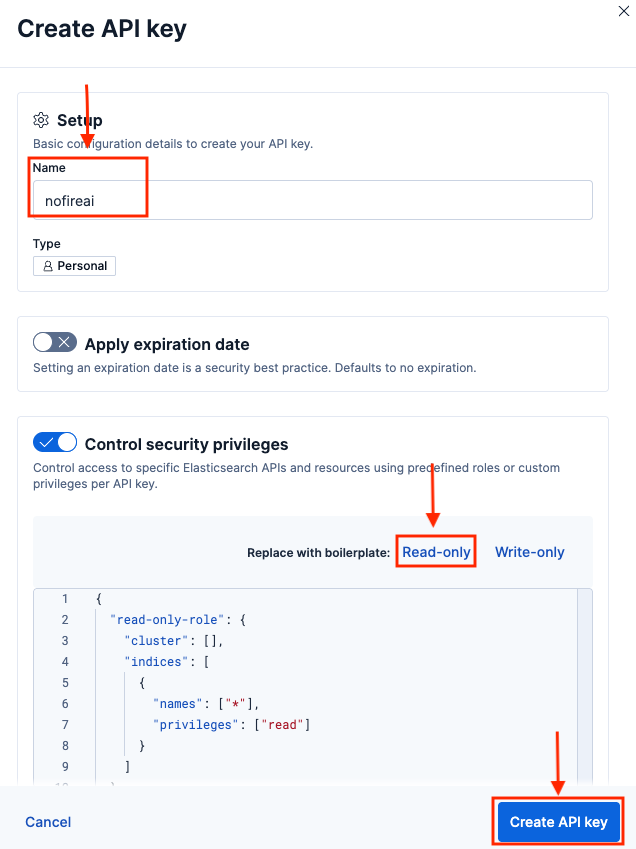
Configure API Key:
- Name: Enter
nofireai - Control security privileges: Select read to ensure the key has read-only access
- Index privileges: Click read-only access
- Click Create API key
- Name: Enter
-
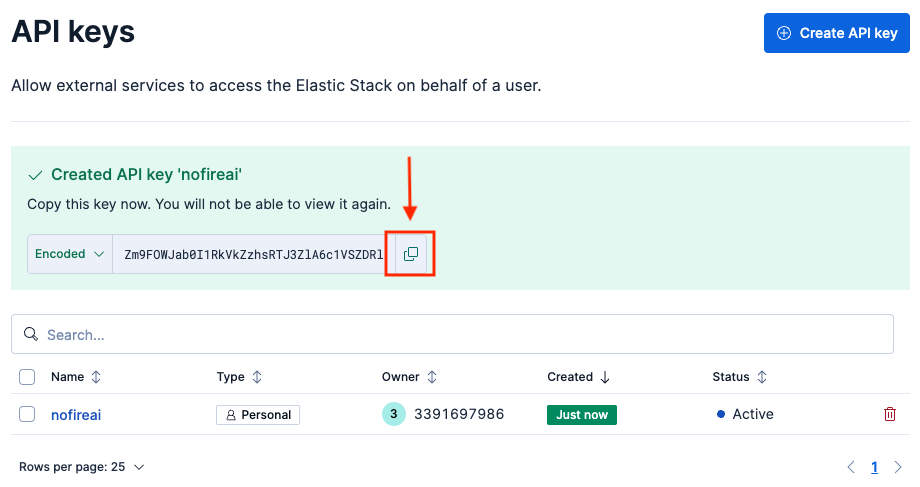
Save API Key:
Copy the API key value (the encoded string, not the ID).
Self-Hosted Elasticsearch with API Key
Create API Key in Self-Hosted Elasticsearch
Create API Key in Self-Hosted Elasticsearch
-
Access Kibana: Navigate to your Kibana URL (typically
https://your-elasticsearch-host:5601) - Log in: Use your Elasticsearch admin credentials
-
Navigate to Stack Management: Open the hamburger menu (☰) and go to Management > Stack Management
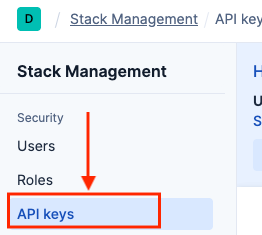
- Create API Key: Follow steps 6-8 from Option A above
Step 2: Add Elasticsearch Connection to NOFire AI
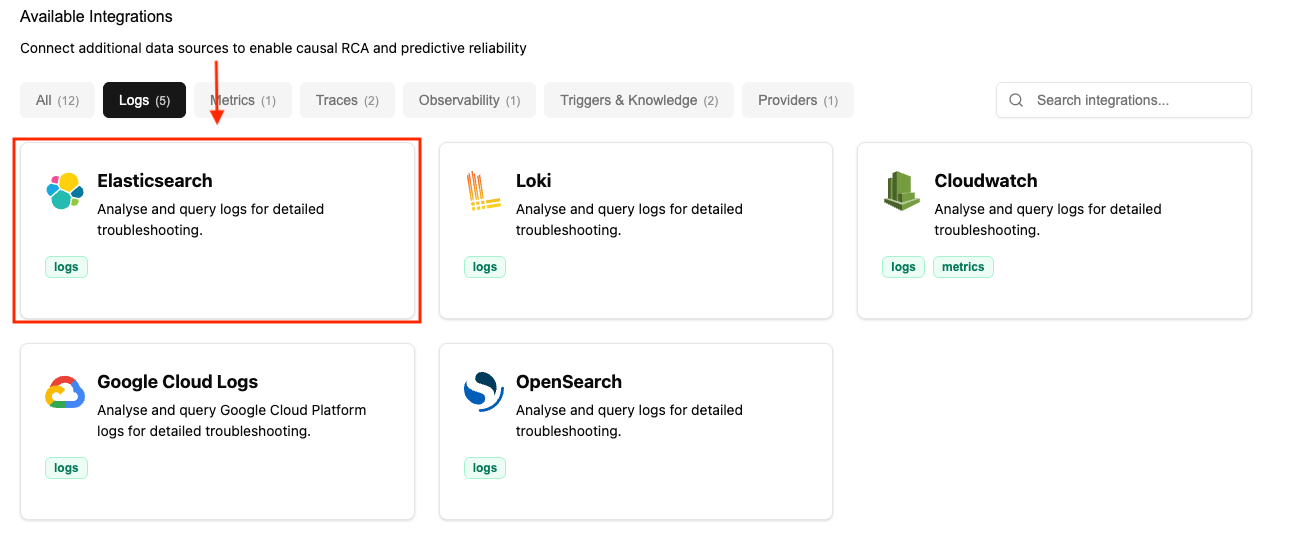
Navigate to the Connections Tab
Navigate to the Connections Tab
-
Select Elasticsearch: From the list of available connections
-
Enter Connection Details:
- Connection name: Enter a descriptive name (e.g., “production-elasticsearch”)
- URL: The endpoint to your Elasticsearch instance (including the port number)
- Example:
https://my-elasticsearch-project-a09d34.es.us-central1.gcp.elastic.cloud:443
- Example:
- Token: The API Key that was generated in the previous step
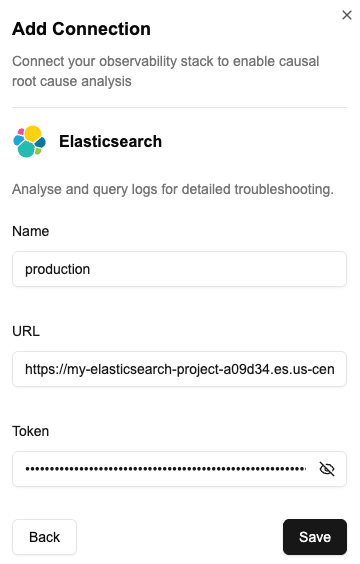
- Test and Save: Click Test Connection to verify the credentials, then Save to create the connection. Once the connection to your log source is established, NOFire AI will query and analyze logs on-demand as part of its automated root cause analysis. Logs are used to enrich the investigation process.
Troubleshooting
Common Issues
Common Issues
Connection Timeout
If you experience connection timeouts:- Verify that your Elasticsearch endpoint is accessible from NOFire AI’s network
- For Elastic Cloud, check your deployment’s traffic filters
- Ensure firewall rules allow traffic on port 9200 or 9243 (Elastic Cloud)
Authentication Failed
If authentication fails:- Ensure the API key or user hasn’t been revoked or expired
Forbidden or Authorization Errors
If you see 403 Forbidden errors:- Verify the API key or user has the correct index privileges
- Check that the role includes
readandview_index_metadataprivileges - Ensure the index pattern in the role configuration matches the indices you’re querying
SSL Certificate Errors
For self-hosted instances with SSL errors:- Ensure your SSL certificate is valid and not self-signed (or add it to trusted certificates)
- Verify the hostname in the URL matches the certificate