

Declaring incidents is the only incident.io feature available today. The connection card also mentions starting investigations for new incidents and learning from post-mortems. Those are not available yet.
Prerequisites
- An incident.io account, and permission to create an API key in it.
- A NOFire AI investigation to declare from. Investigations start from alerts, automations or chat.
Step 1: Create an incident.io API key
Generate an API key in incident.io
Generate an API key in incident.io
- In incident.io, go to Settings → API keys and create a new key.
-
Name the key, for example
NOFire AI. -
Grant the roles for what you want NOFire AI to do:
- Create the key and copy it. incident.io shows it only once. You enter it in Step 2.
The connection form also lists View all incident data (
global_access), for private incidents, and On-call viewer (on_call_viewer), for answering who is on call in chat. Neither feature is available yet, and declaring incidents does not need either role, so you can leave them out.Step 2: Add the incident.io connection in NOFire AI
Configure the connection
Configure the connection
-
Open Connections and click Connect on incident.io.

-
Enter:
- Name, for example
production - API key: the key from Step 1
- Name, for example
-
Click Test key. NOFire AI shows the key name and your incident.io organization, and marks each role as Granted or Not granted.
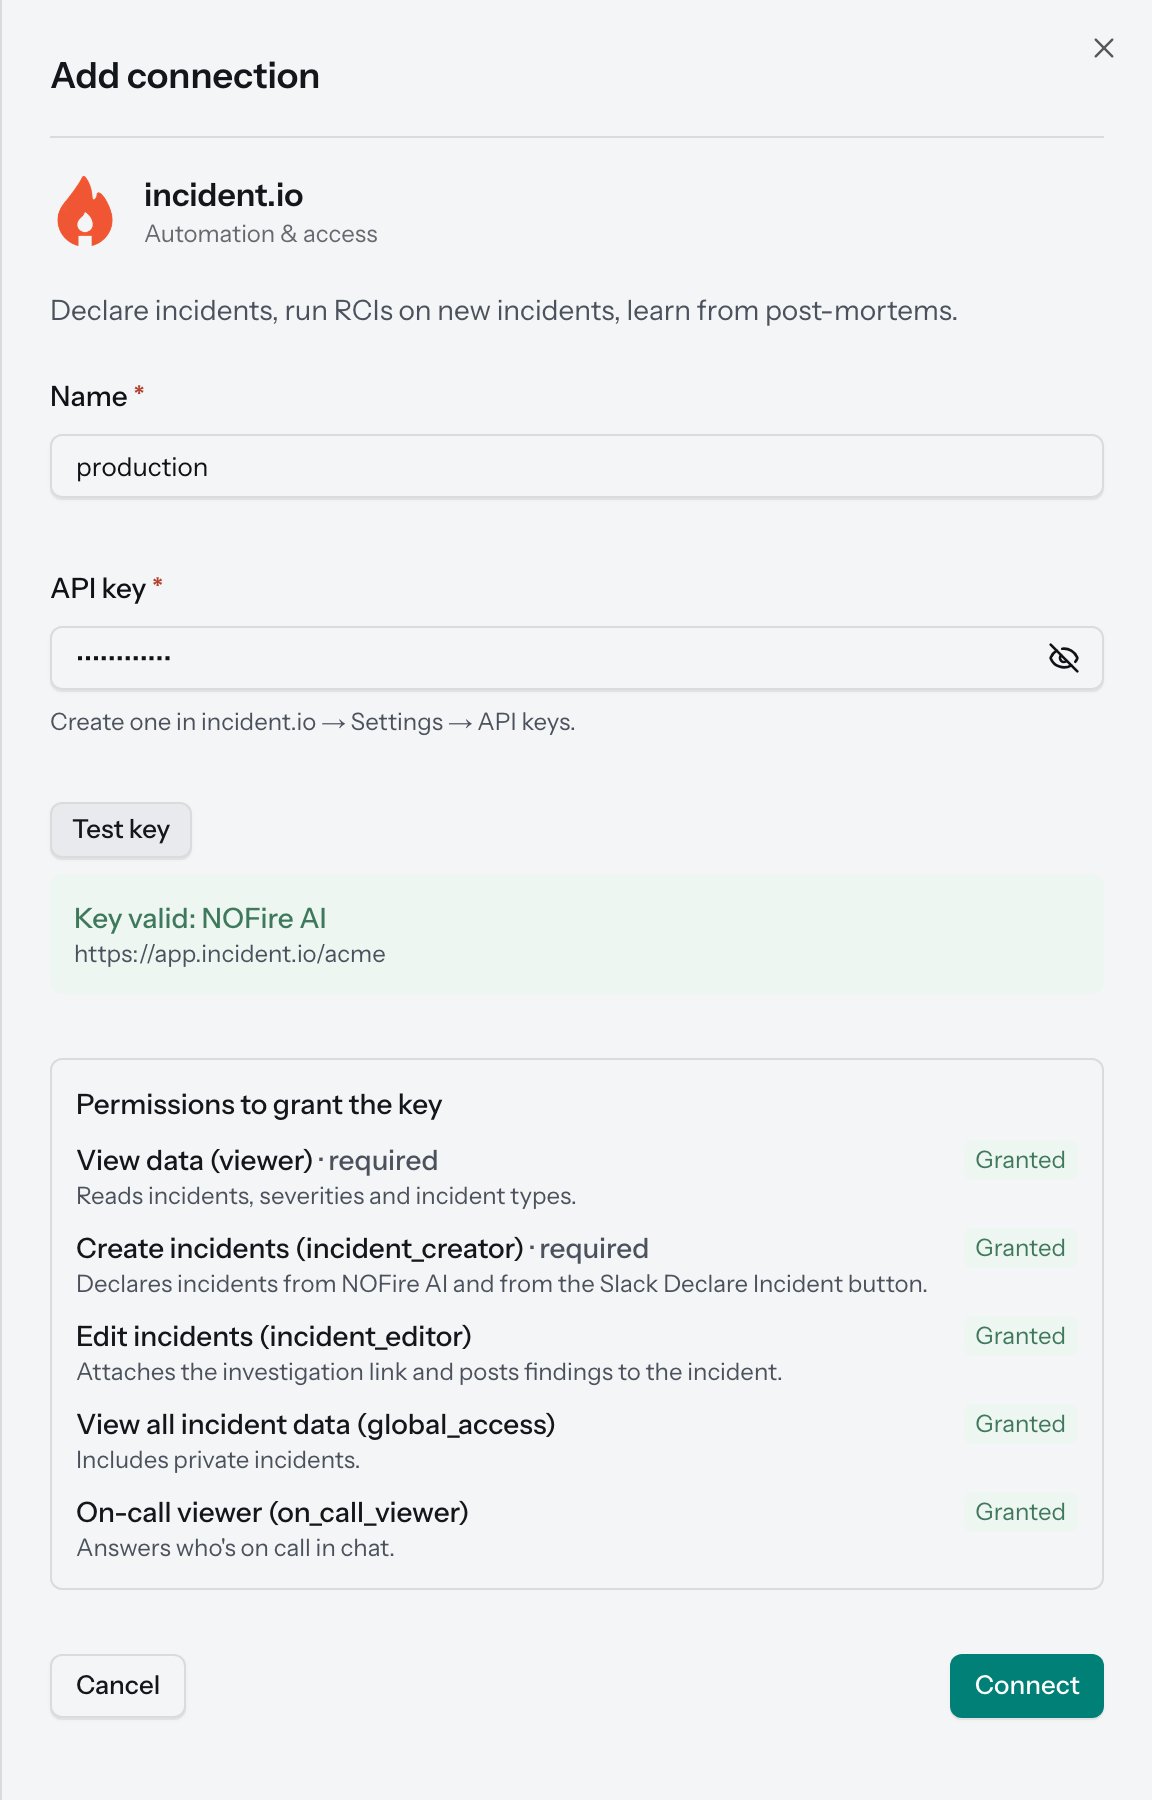
- Click Connect.
Declare an incident
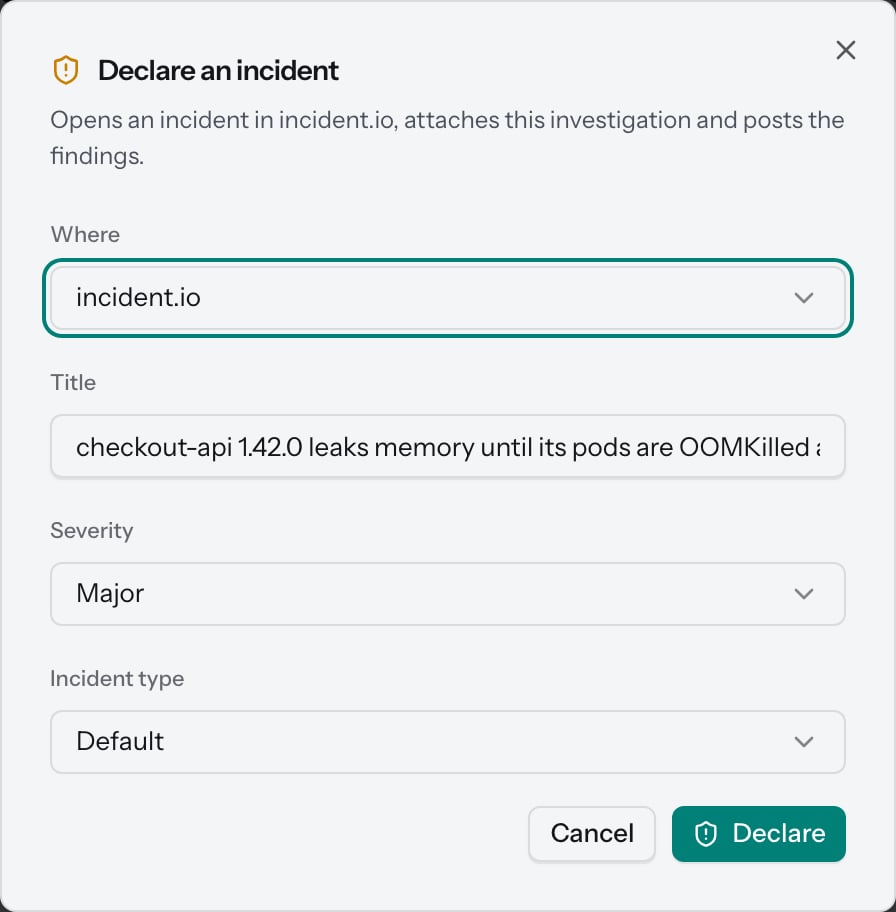
- Open an investigation and click Declare incident (the shield icon) in its header.
- Under Where, choose incident.io. If you have more than one incident.io connection, choose the Connection.
- Check the Title. It defaults to the investigation title.
- Choose a Severity and an Incident type. Both lists come from your incident.io account. NOFire AI preselects the severity closest to the one it suggests for the investigation.
- Click Declare.

Declare an incident from Slack
NOFire AI’s investigation messages in Slack carry a Declare Incident button. The Declare Incident button setting in Slack admin settings decides what the button does:- Slack war room: the button opens a Slack incident channel. This is the default until you connect incident.io.
- An incident.io connection, listed by name: the button declares the incident in incident.io and replies in the thread, visible only to you, with the incident reference and a link. NOFire AI uses incident.io’s default incident type and the severity closest to the one it suggests.
Test the connection
- Open Connections and make sure that the incident.io connection shows Connected. A connection that shows Failing did not authenticate.
- Declare an incident from an investigation. The incident reference appears in the investigation header, and the link opens the incident in incident.io.
Troubleshooting
Slack says the incident could not be opened in incident.io
Slack says the incident could not be opened in incident.io
incident.io rejected the request or could not be reached. Test the connection in Connections: the test fails if the key was revoked or lost Create incidents. Fix the key, then click Declare Incident again.
The incident opens without the investigation link or findings
The incident opens without the investigation link or findings
The key lacks Edit incidents. The dialog warns about this before you declare: “The link and findings will not be posted: the key lacks Edit incidents.”
The severity list is empty
The severity list is empty
Your incident.io account has no severities configured, or NOFire AI could not load them. The dialog then lets you declare without choosing one, and NOFire AI uses its suggested severity.
Test key fails
Test key fails
If the form names a missing role, add View data or Create incidents to the key in incident.io and test again. Otherwise the key is wrong or was revoked. Create a new key in incident.io and paste it again.